30 DIY Creative Storage Ideas for Small Spaces
Living small doesn’t mean living with clutter, and I’m here to help you turn every inch of your home into smart, stylish storage that actually works for you.
In this guide, I’ll share DIY storage ideas you can build in an afternoon using affordable materials and simple tools you likely already own.
We’ll think vertically, tap into corners and dead space, and sneak storage behind doors, under furniture, and along walls without sacrificing your vibe.
Expect renter-friendly fixes, budget-savvy upcycles, and modular solutions you can reconfigure as your needs change.
You’ll learn how to add personality with custom finishes, clever hardware, and design tricks that make small spaces feel bigger and more intentional.
Ready to clear surfaces, calm the chaos, and make your home feel open and organized? Grab a tape measure, and let’s create space you didn’t know you had.
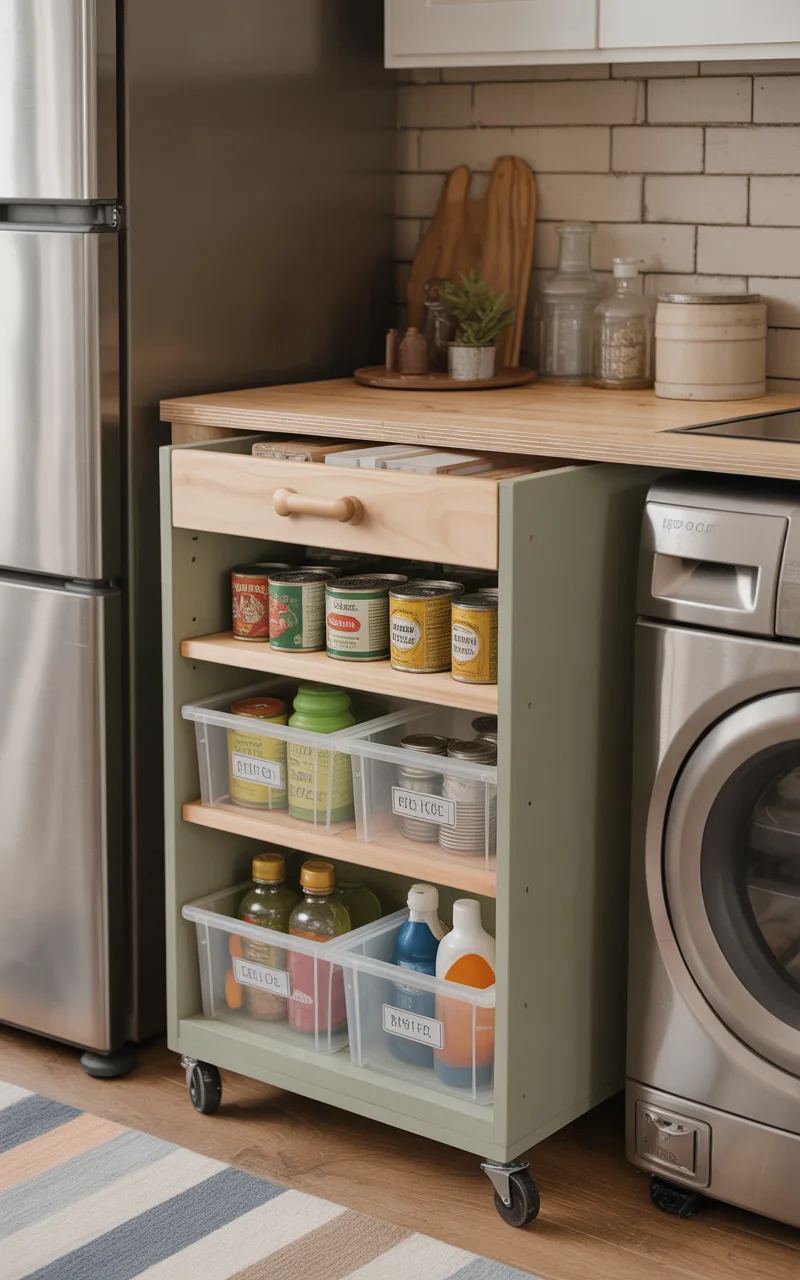
DIY Slim Rolling Gap Cart for That 6-Inch Space
If you have that awkward sliver next to your fridge or washer, let’s put it to work with a slim rolling cart you can build in an afternoon.
Cut a narrow plywood box the depth of your appliance, add simple shelf cleats, screw on four casters, pop in a dowel or cabinet pull as the handle, and stash cans, spices, or cleaning bottles in labeled bins.
Color scheme: matte sage or soft greige for the body, natural wood for the handle, and matte black hardware, with clear bins so you can spot what you need at a glance.
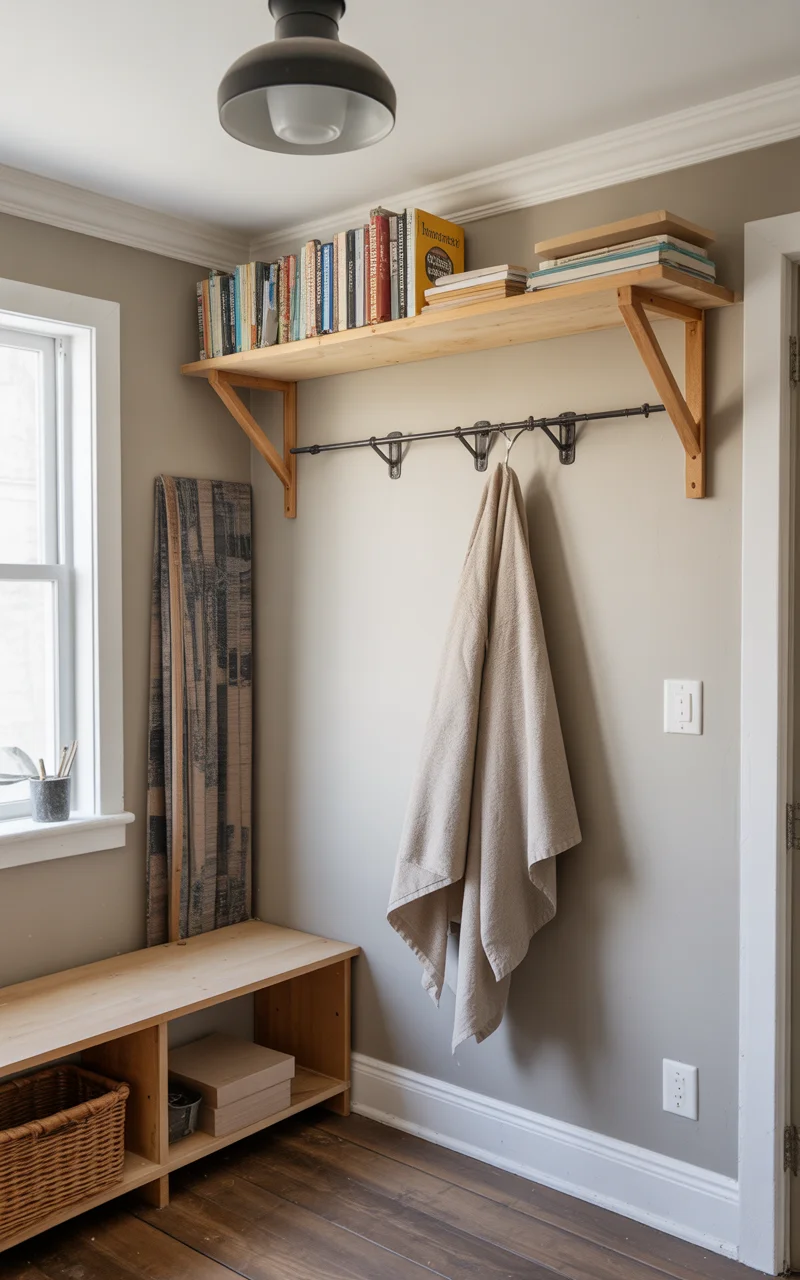
DIY Above-the-Door Shelf Ledge
Put the blank space above any doorway to work by anchoring two L-brackets into studs or heavy-duty anchors, setting a cut-to-width 1×8 board on top, and loading it with books, towels, or paper goods.
I like adding a thin 1×2 front lip so nothing slides when you reach up, and it still looks clean and minimal.
Color scheme: paint the board the same color as your wall to help it disappear, with matte black or warm brass brackets for a little polish.
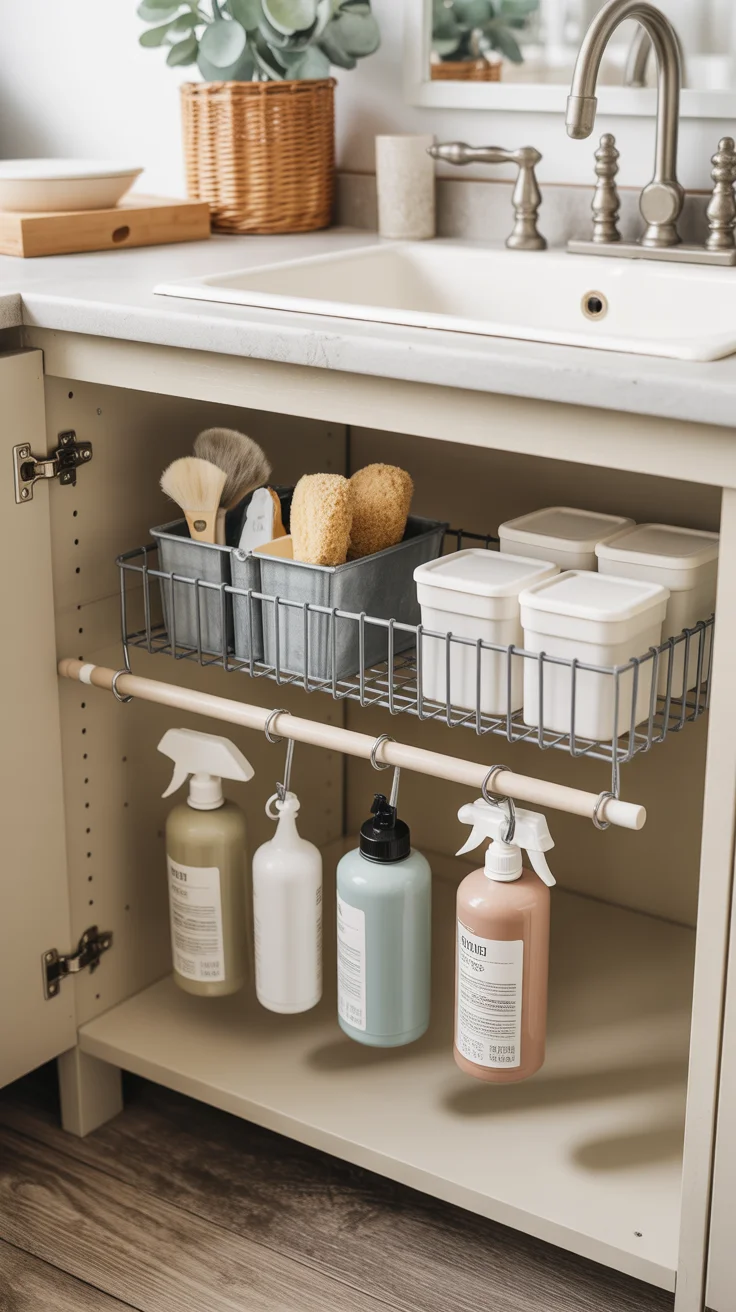
DIY Under-Sink Tension-Rod Shelf + Hanger
You can turn the wasted space under your sink into a neat storage tier with two tension rods, a metal cooling rack, a few zip ties, and S-hooks for a total that fits a tight budget.
Set the rods parallel along the cabinet sides so they support the cooling rack as a shelf for sponges, brushes, and small bins, then hang spray bottles by their triggers from the front rod using S-hooks.
Color scheme: go with white or matte black rods, silver hooks, and clear or frosted bins so you can spot what you need fast.
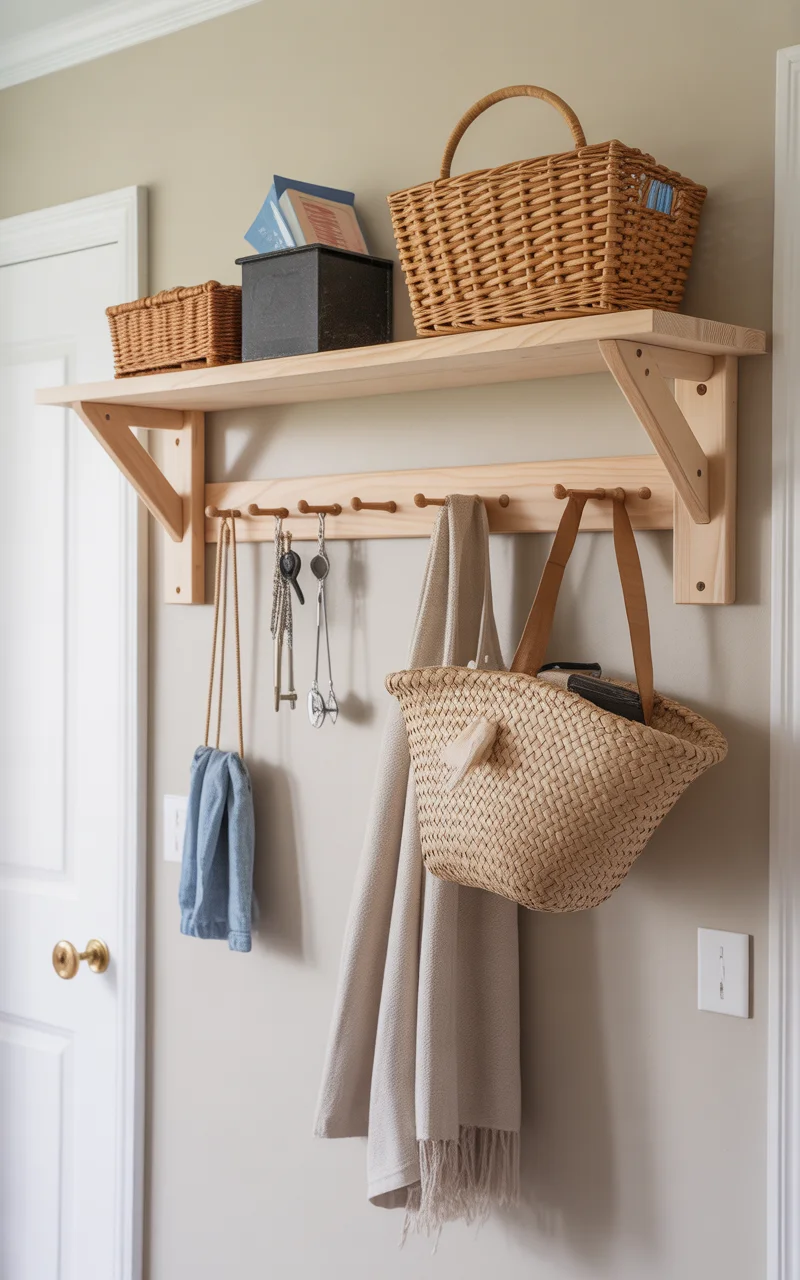
DIY Shaker-Style Peg Rail with Slim Ledge
If you’re craving a tidy entry or bath without bulky furniture, build a Shaker-style peg rail with a slim ledge that holds keys and mail up top while the pegs handle bags, hats, or towels—I use mine by the door for leashes and a tiny tray.
Glue and nail a 1×3 ledge onto a 1×4 board, tap in 3/4-inch dowel pegs spaced 6–8 inches apart, then drive screws through predrilled countersunk holes into studs or heavy-duty anchors at shoulder height.
Color scheme: paint to match the wall for a seamless look, or leave it natural and seal with matte clear, pairing it with woven mini baskets for texture and matte brass screws for a quiet detail.
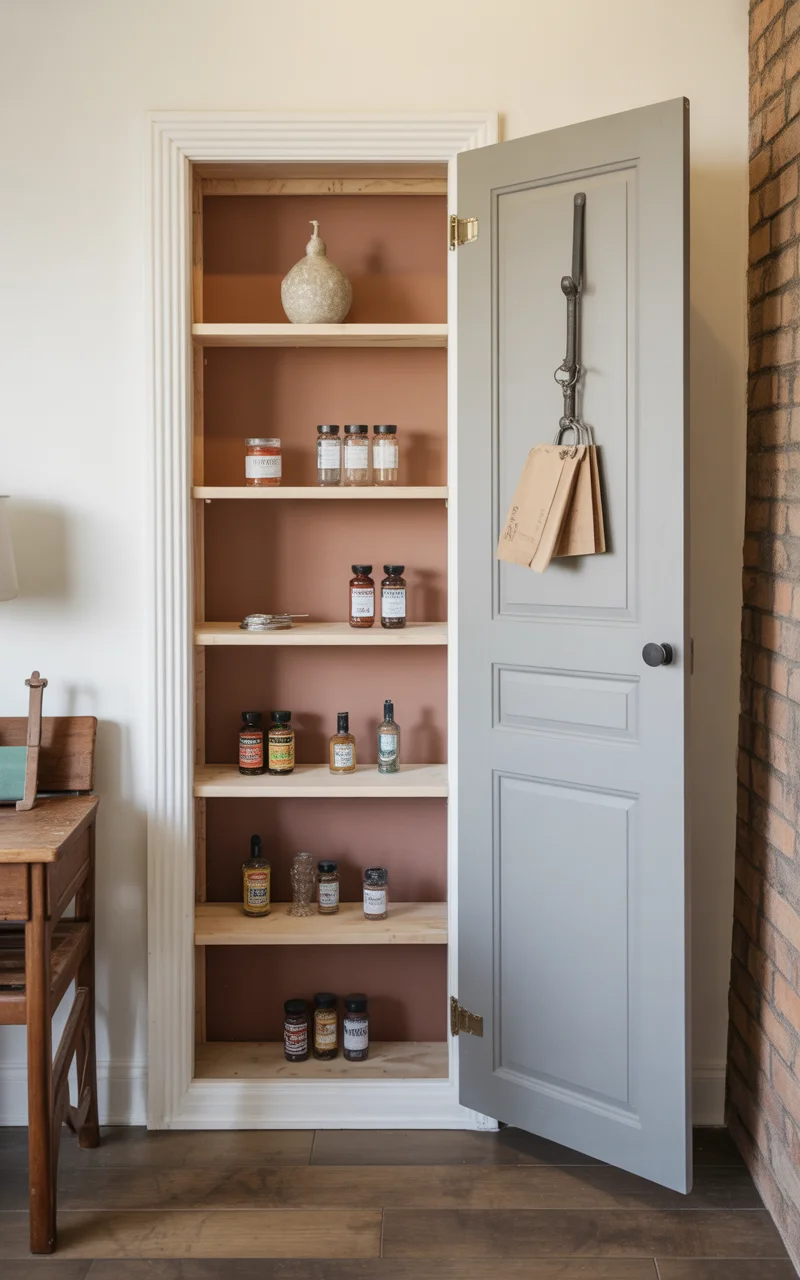
DIY Between-Stud Recessed Niche Hidden Behind a Hinged Frame
You’ll turn an empty wall cavity into concealed storage by building a shallow recessed niche and hiding it behind a hinged picture frame or mirror.
After confirming the spot is clear of wires and plumbing with a stud finder, cut between two studs, line the opening with 1x2s, add shelves or shelf pins, mount your frame on a piano hinge with a magnetic catch, and fill it with spices, skincare, keys, or mail.
Color scheme: paint the niche your wall color for stealth or a warm clay accent inside, pair with matte black or unlacquered brass hardware, and choose a frame that matches your room so it reads as decor.
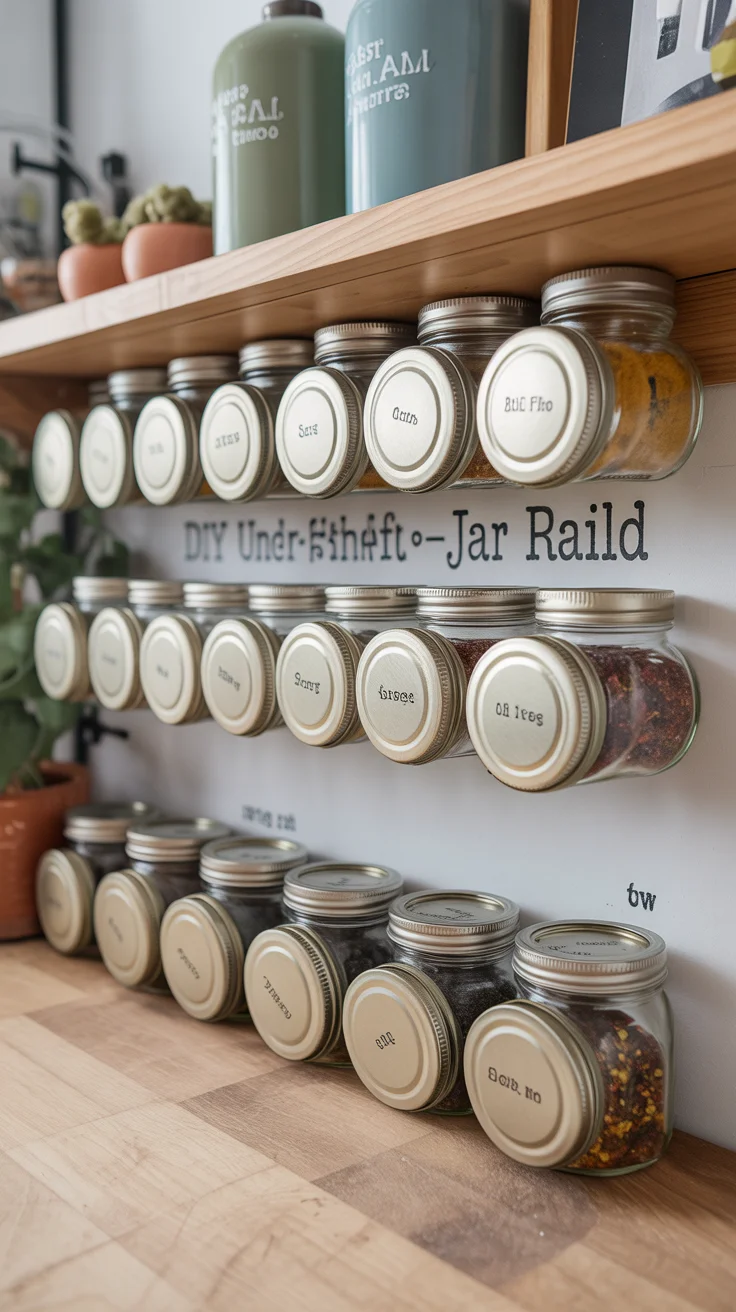
DIY Under‑Shelf Twist‑In Jar Rail
Let me show you how to put the dead space under a shelf or cabinet to work by screwing canning‑jar lids to the underside in a simple grid, then twisting jars on to hold spices, screws, craft bits, or cotton rounds.
Pre‑drill and use short screws so you don’t poke through, add a shallow 1×2 face strip if you want the lids hidden, and label jar bottoms with a paint pen so you can read them from below.
Color scheme: natural or paint‑to‑match shelf, matte black or warm brass screws, and clear jars with crisp white labels—I keep chili flakes above the stove and buttons in the studio because it’s satisfying to click them in.
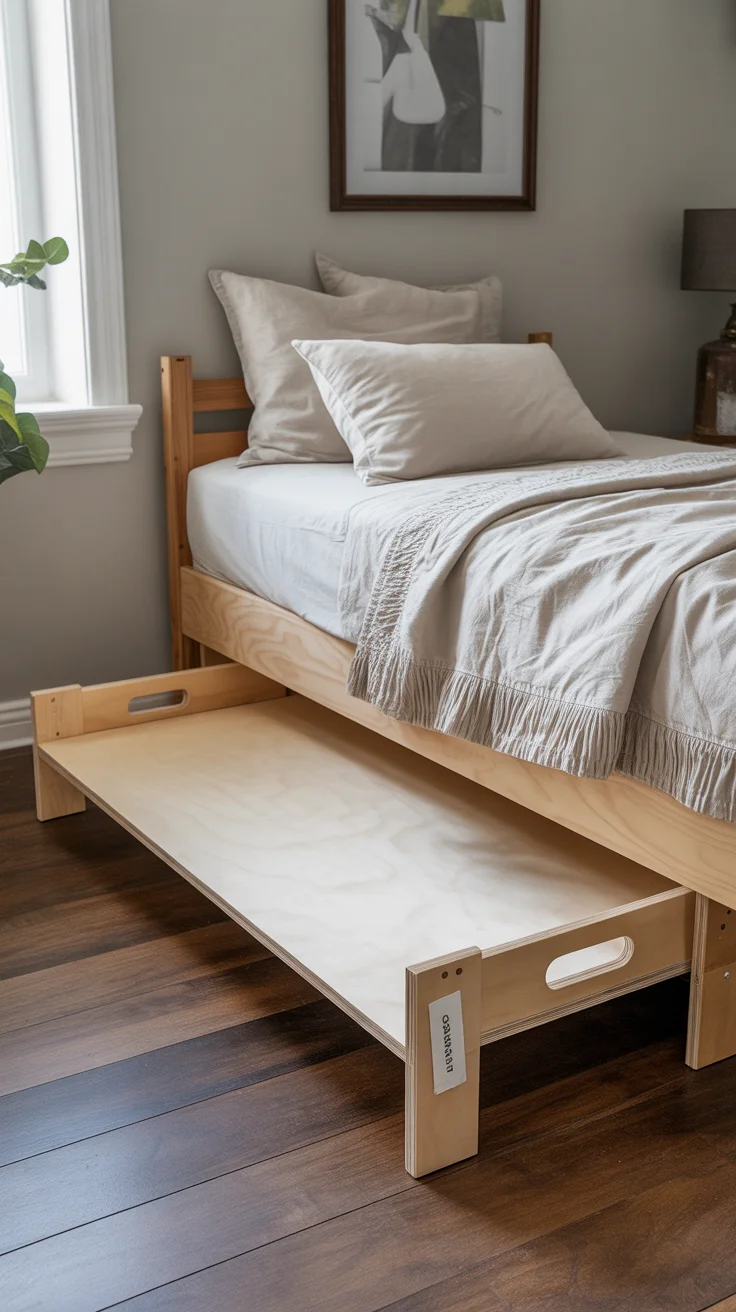
DIY Low‑Profile Under‑Bed Slide Trays
If you’ve got a few inches under your bed or sofa, build flat slide trays from a 1/4-inch plywood base with 1×2 side rails so you can corral off‑season clothes, linens, or shoes without bulky bins.
Cut to fit your opening, glue and brad‑nail the rails around the base, add felt pads or thin furniture sliders at the corners, and screw on a small finger pull or drill a clean oval cutout so you can grab and go.
Color scheme: paint or stain the rails to match your floor or bed frame, keep the base natural sealed in matte clear, and add simple white labels on the rail ends so you spot what’s what fast.
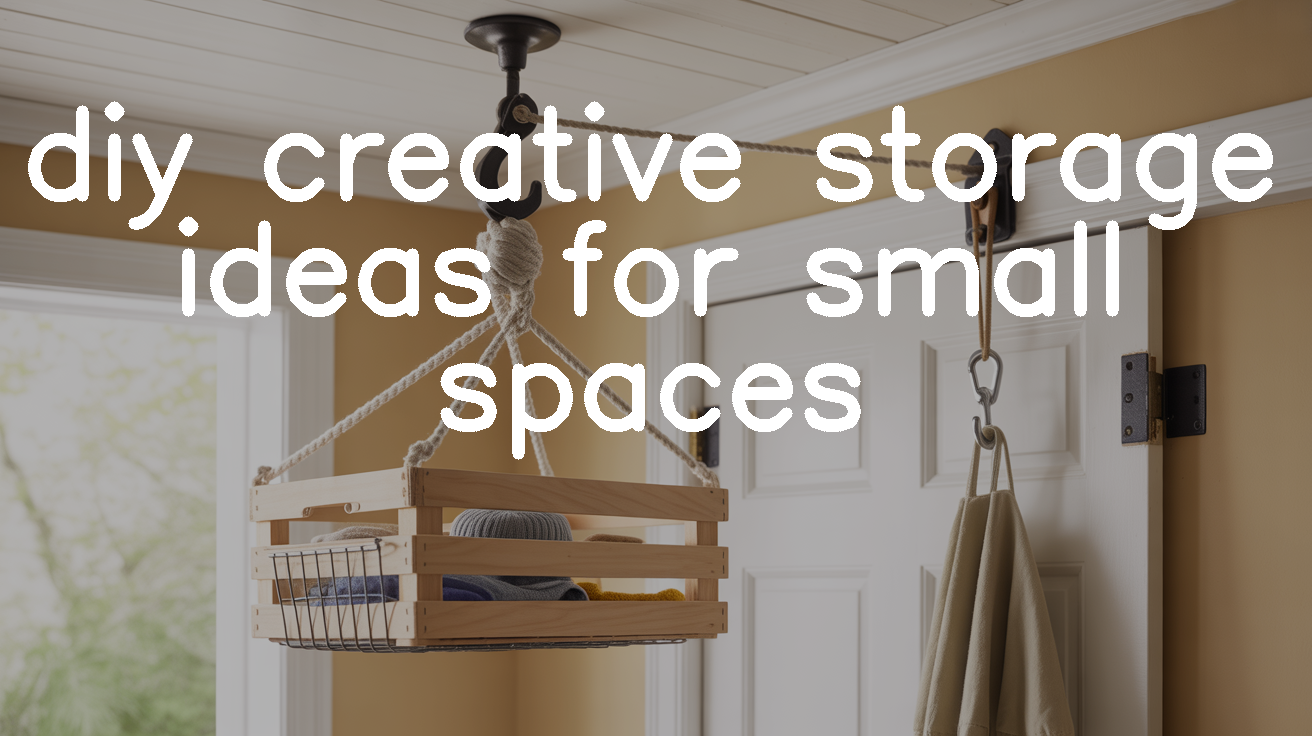
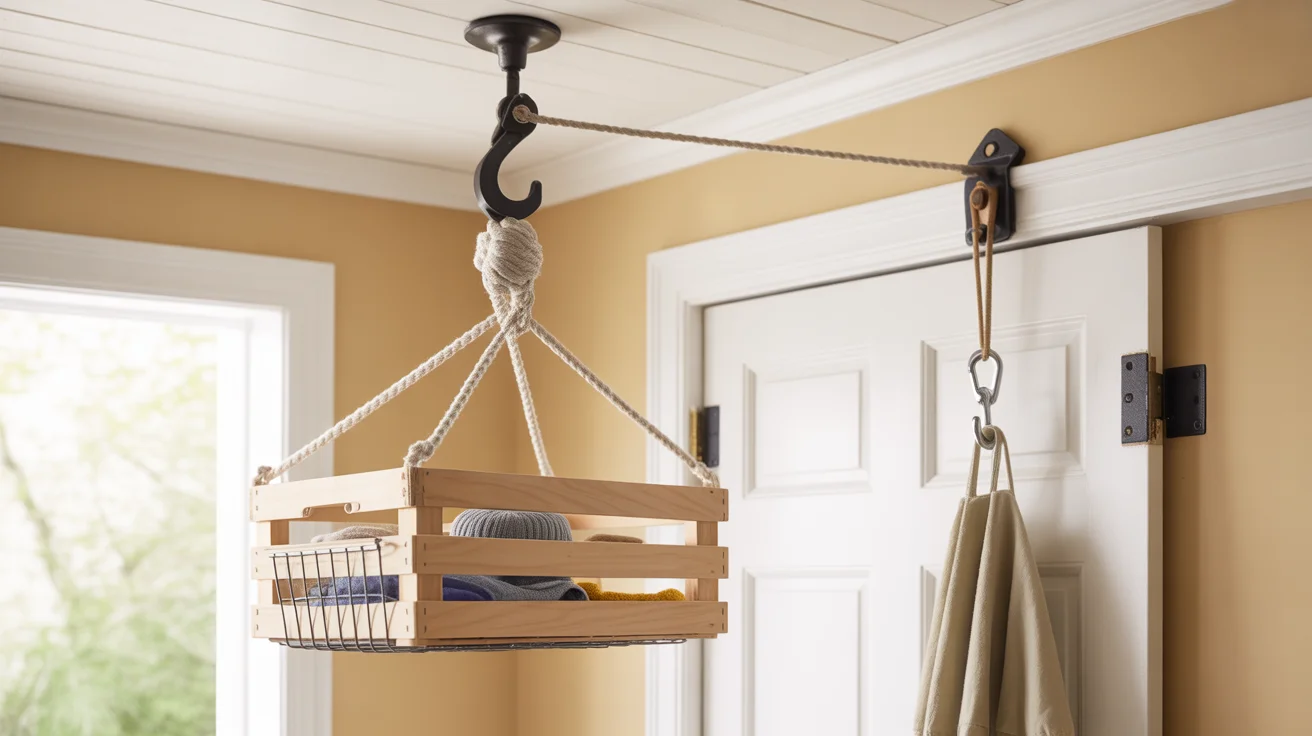
DIY Ceiling‑Hoisted Basket with Dock‑Cleat Tie‑Off
Let’s borrow some headroom by hanging a shallow crate or wire basket from a rope‑and‑pulley anchored into a ceiling joist, then run the rope down to a small boat cleat so you can lift daily stuff up out of the way and drop it down in two seconds when you need it.
Use a swivel pulley rated for 50 lb+, braided cotton rope, an eye screw and carabiner as a safety stop, and keep the basket shallow so it clears door swings; I like one by the entry for hats and mittens or in a bath for extra towels.
Color scheme: natural wood or white basket, ecru rope, and matte black hooks and cleat, with a tiny leather tab on the rope end so it feels finished.
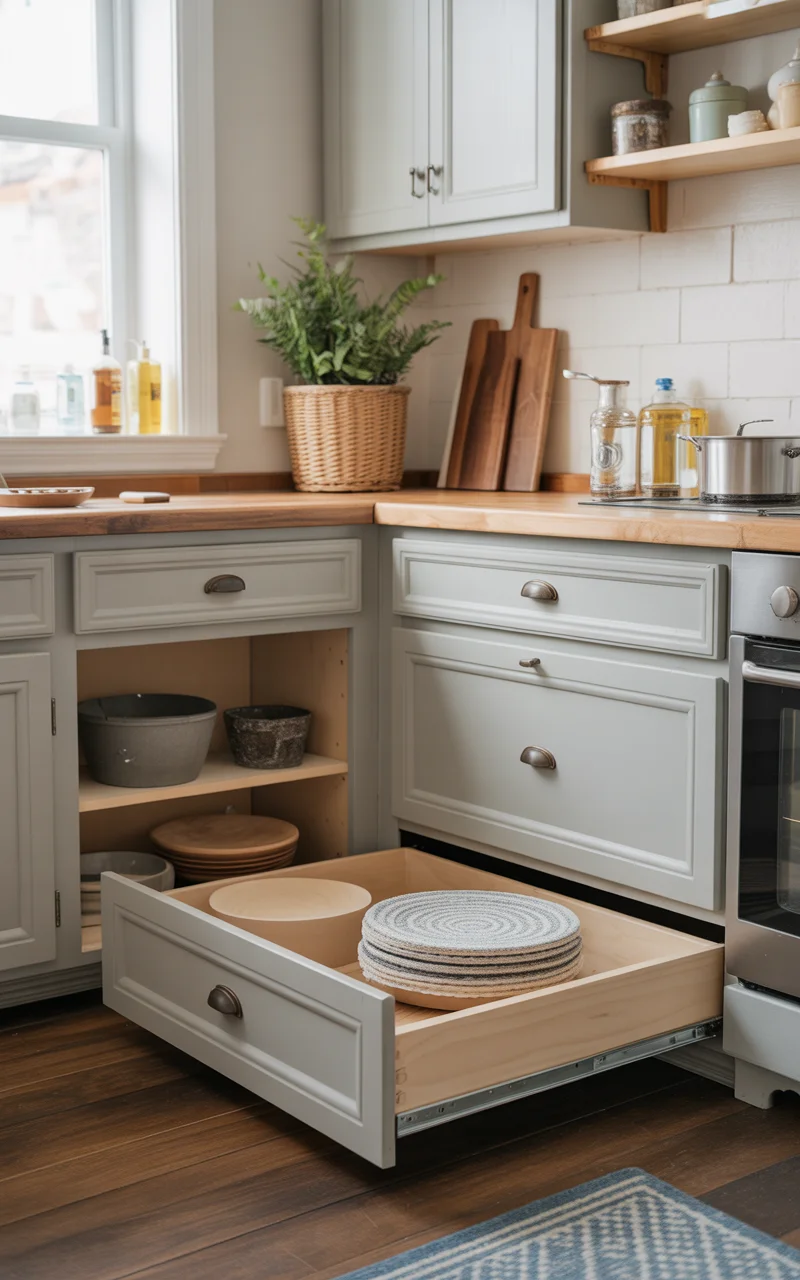
DIY Hidden Toe‑Kick Drawers Under Your Base Cabinets
Put that 3–4 inch strip under your kitchen or bath cabinets to work by removing the toe‑kick panel, building a shallow box on low‑profile slides, and attaching a flush false front so it disappears until you pull it.
Tuck in baking sheets, cutting mats, placemats, pet bowls, or cleaning pads—I like a push‑to‑open latch so you can tap it with your foot when your hands are full.
Color scheme: paint the face to match your cabinets or baseboard for a seamless line, choose matte black or brushed nickel hardware (or none with push‑to‑open), and keep the inside natural wood sealed in matte clear.
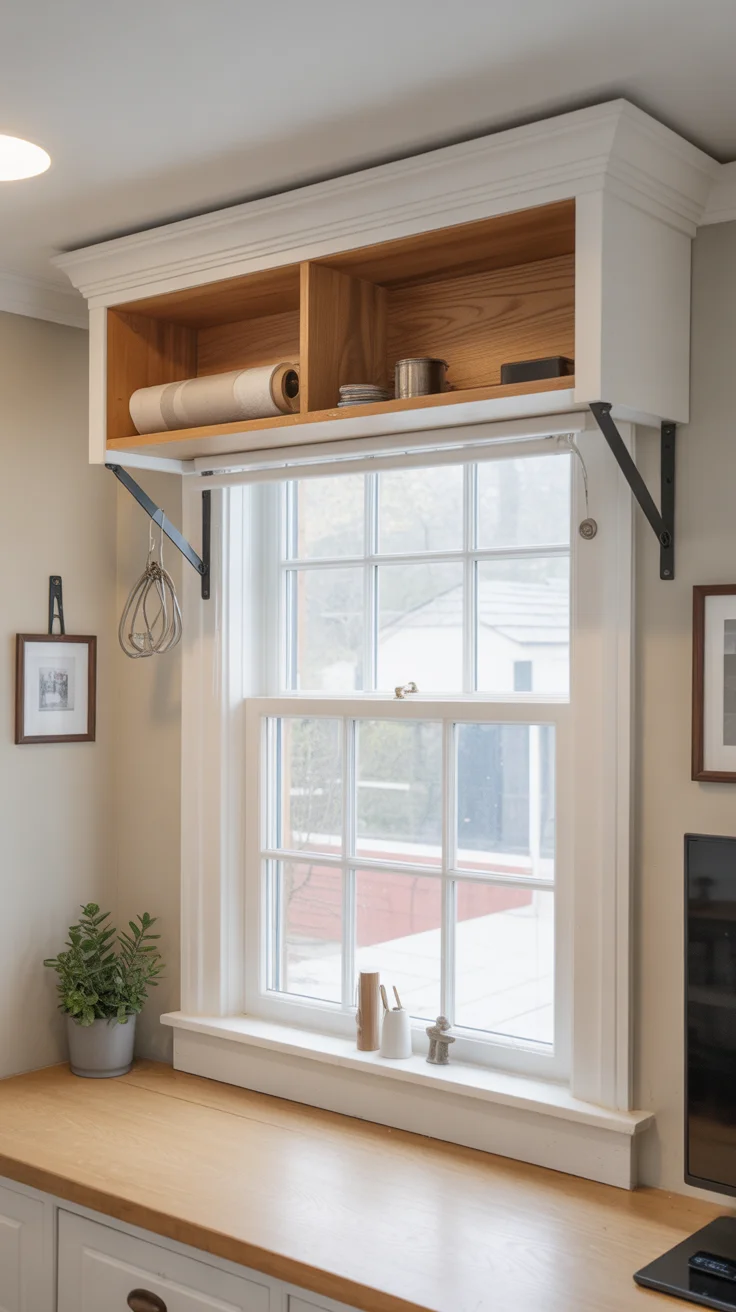
DIY Hidden Storage Valance Above the Window
Let’s turn the dead zone above your window into storage by building a slim valance box that looks like trim but flips up on a piano hinge, anchored into studs with a soft‑close or friction lid support for smooth one‑hand access.
Inside, I add a dowel for gift‑wrap rolls, a shallow divider for remotes or cards, and a few cup hooks for scarves or cables, and you can size it to your window width so it feels custom without crowding the room.
Color scheme: paint to match the wall or trim for stealth, or go warm white with a natural oak face and matte brass or black hardware for a clean, tailored look.