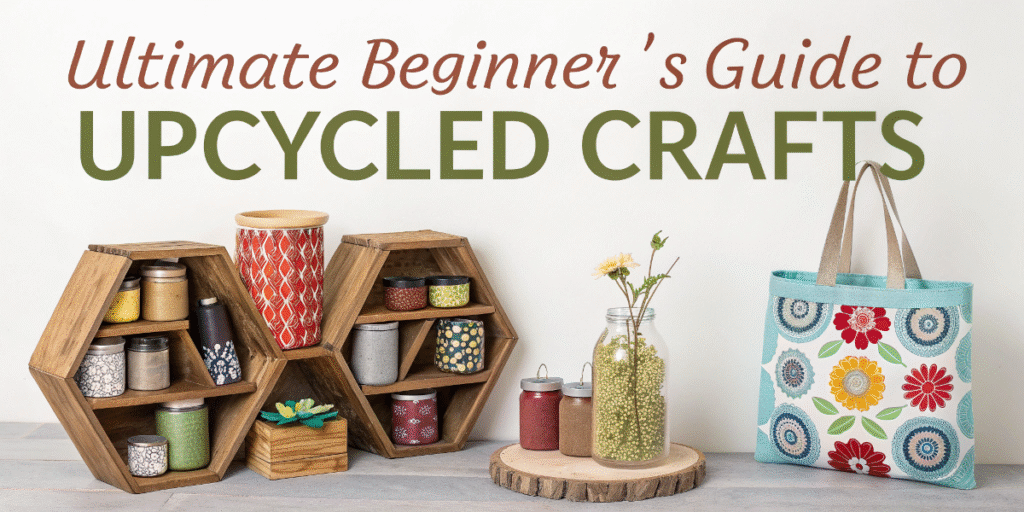
Have you ever looked at an empty glass jar, an old t-shirt, or a stack of cardboard boxes and thought, “There has to be something I can do with this”?
Welcome — you’re officially in the right place.
Upcycled crafts aren’t just a fun hobby; they’re a powerful way to turn everyday waste into beautiful, functional, and even sellable items. Whether you’re brand new to the world of eco-friendly DIY crafts or already leaning into intentional crafting, upcycling lets you express your creativity while making a real impact — for the planet and your wallet.
Why Upcycling Matters in 2025
In today’s world, sustainability is no longer a trend — it’s a necessity. We’re living in a time of rising waste, shrinking resources, and an urgent call for more responsible consumption. Upcycling answers that call beautifully:
- ♻️ Sustainability: Reduces landfill waste and supports the circular economy
- 💡 Creativity: Challenges you to think differently and craft with purpose
- 💰 Cost-effectiveness: Saves money by repurposing what you already have
And in an era where people are more conscious about fast fashion, overconsumption, and their carbon footprint, upcycled crafting offers an empowering way to take action — starting right at home.
This guide is your all-in-one toolkit for learning what upcycling is, how to get started with confidence, and how to transform “trash” into truly meaningful creations. You’ll get:
- The right mindset for long-term creative reuse
- A list of essential tools and eco-conscious materials
- 10 beginner projects you can start today
- The latest design tips to make your crafts stylish, not scrap-y
- Guides to organizing your space and finding free materials
- Free printable resources and real-world inspiration
- Plus, insider insights based on 20+ years of craft experience
Whether you’re in a tiny apartment or a classroom, you’ll find something in here to ignite your creativity and start making a difference — one upcycled piece at a time.
✨ Let’s get crafting — and make 2025 the year you create more, waste less, and build a lifestyle you’re proud of.
What Is Upcycling? (And Why It’s More Than Just Recycling)
At first glance, upcycling might seem like just another buzzword in the sustainability movement. But look closer, and you’ll find it’s actually a creative, powerful, and deeply personal way to reduce waste — one craft at a time.
🔄 Upcycling vs. Recycling vs. Repurposing: What’s the Difference?
Let’s clear up some common confusion:
| Term | Definition | Key Difference |
|---|---|---|
| Recycling | Breaking down materials to remake them into new products | Often energy-intensive, industrial process |
| Repurposing | Using an item in a new way, with little or no modification | Functional reuse, not necessarily artistic |
| Upcycling | Transforming discarded materials into something of higher quality or value | Adds artistic, functional, or emotional value |
While recycling focuses on reprocessing materials (e.g., melting plastic or paper), upcycling is about elevating them — turning a used wine bottle into a lantern, or an old denim jacket into a stylish tote. It’s part art, part eco-consciousness, and part DIY innovation.
🧠 The Heart of Creative Reuse
Upcycling is a form of creative reuse that combines sustainable living, intentional crafting, and resourcefulness. It asks: What can this become? — not What do I throw away?
Whether you’re turning cardboard into wall art or repurposing sweaters into cozy pillows, each upcycled project helps fight waste, reduce overconsumption, and inspire others to rethink the lifecycle of stuff.
Key terms to include and understand here:
- Circular economy
- Waste reduction
- Reuse over replace
- Sustainable crafting
- Low-waste lifestyle
These aren’t just buzzwords — they’re essential building blocks of the eco-conscious DIY movement that’s growing rapidly on platforms like Pinterest, Etsy, and YouTube.
🌍 A Brief Look at the History and Cultural Relevance of Upcycling
Although the term “upcycling” was coined in the 1990s and gained popularity in the 2000s, the practice itself is ancient. Think wartime thrift, Depression-era creativity, and Indigenous traditions that honored resources by wasting nothing.
Cultures around the world have long reused clothing, tools, containers, and natural materials for practical, spiritual, and artistic reasons. Today, that spirit is alive in movements like:
- Zero-waste living
- Slow fashion
- DIY minimalism
- Eco-conscious crafting
Upcycling in 2025 isn’t just about “saving money” — it’s about reclaiming creativity, building intentional habits, and joining a larger global push toward more ethical consumption.
✅ Why It Matters for You
When you embrace upcycling as a beginner:
- You save materials from landfill
- You gain confidence and skill as a maker
- You connect with a growing community of eco-creators
- You begin a creative journey that’s rewarding, relaxing, and planet-positive
And unlike recycling — which often requires municipal facilities and processing plants — upcycling starts right at home, with your hands, your imagination, and what’s already around you.
Getting Started : Mindset and Preparation
Before diving into your first upcycled project, pause. Upcycling isn’t just about what you make — it’s about how you think. Your mindset as a maker influences not only your creativity but also your impact on the planet and the values behind your work.
This section will help you develop the foundational mindset of an ethical, sustainable upcycler — so you can craft with confidence, clarity, and purpose.
🧠 Shift Your Thinking: From Consumer to Creator
Modern life trains us to think like consumers: buy, use, discard, repeat. Upcycling invites a more empowering shift — one that sees discarded materials as opportunities for reinvention.

Instead of asking, “What should I buy to make this?” begin asking, “What do I already have that I can turn into something beautiful or useful?”
This is the core of creative reuse — where limitations become fuel for originality.
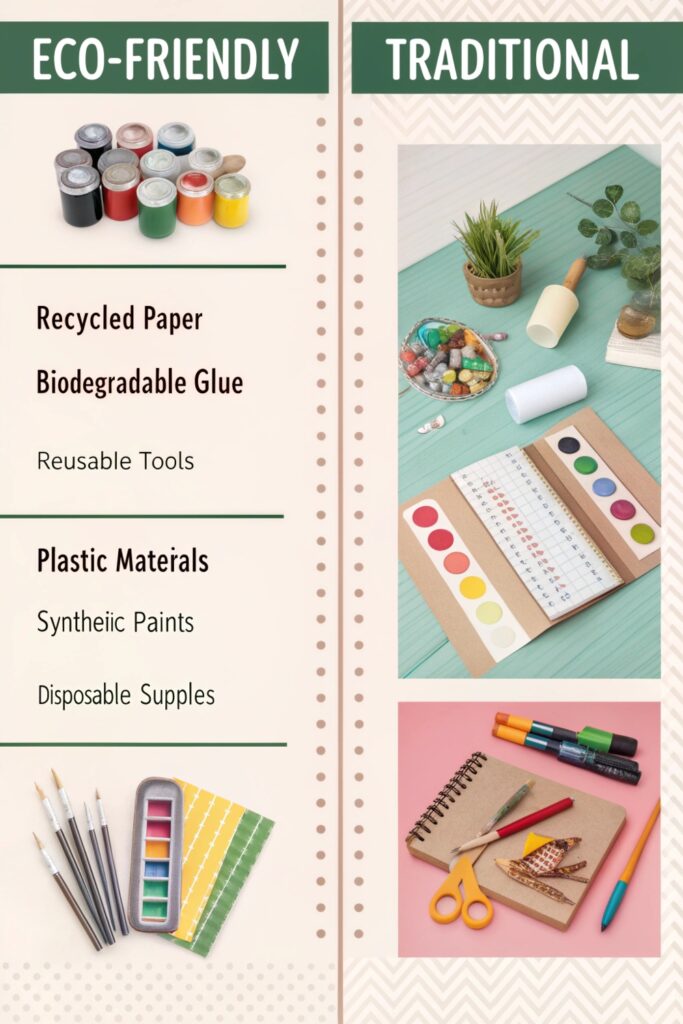
🌱 Sustainable Crafting vs. Traditional Crafting
Not all crafting is sustainable. In fact, traditional crafting often relies on:
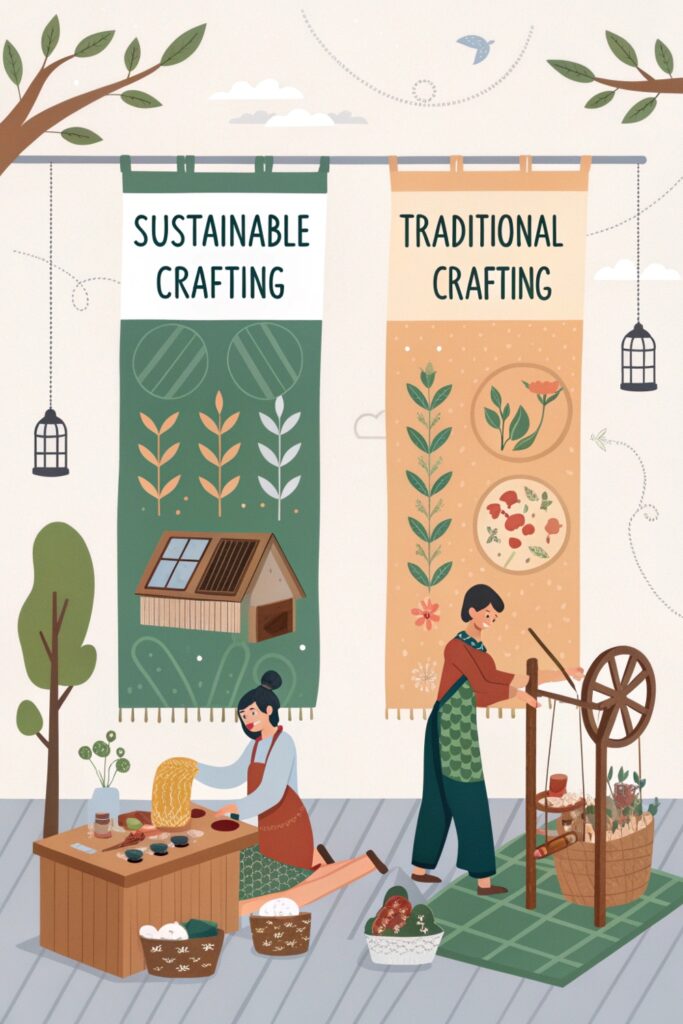
- Mass-produced supplies from chain stores
- Plastic-heavy embellishments and adhesives
- Excessive packaging and waste
- Cheap tools that break quickly and end up in landfills
On the other hand, sustainable crafting focuses on:
- Reusing and upcycling existing materials
- Choosing eco-friendly supplies (like natural glue, recycled yarn, plant-based dyes)
- Reducing plastic and unnecessary waste
- Prioritizing longevity over novelty
The goal isn’t just to create — it’s to create responsibly, with awareness of your materials, your impact, and your waste footprint.
♻️ Embracing Ethical Crafting Practices
Upcycling gives us the chance to not only reduce waste but also craft more ethically. That means asking questions like:
- Where do my materials come from?
- Can I support local artisans or secondhand sources?
- Am I honoring cultural influences respectfully in my designs?
- Is this project truly needed, or just more “stuff”?
Ethical crafting is about making with integrity, not just inspiration.
💡 Example: Instead of buying new leather or faux leather, consider upcycling old bags, belts, or jackets into small leather accessories. This reduces demand for new animal-based or plastic-based goods — and gives something old a new story.
🧘♀️ Intentional Crafting and Slow Living
Upcycling is a beautiful match for the slow living movement — which values mindfulness, purpose, and quality over speed and consumption.
With intentional crafting, your projects may take longer, but they’ll feel:
- More meaningful
- More sustainable
- More rewarding in the long run
Rather than rushing to finish, you’ll learn to appreciate the process: choosing, cleaning, cutting, transforming, and displaying each piece with care.
❌ Let Go of Perfectionism
Many beginners hesitate because they think their upcycled projects won’t look “Pinterest-worthy.” But here’s the secret: the charm of upcycling lies in its imperfections. Visible brushstrokes, patchwork textures, or mismatched patterns are often what make a piece feel authentic and one-of-a-kind.
Your first project may not be flawless — but it will be yours, and it will matter.
👀 Train Your “Upcycler’s Eye”
Once you adopt the right mindset, you’ll start seeing hidden potential in unexpected places:
- A cereal box becomes drawer organizers
- A chipped teacup becomes a candle holder
- Scrap fabric becomes a quilted coaster
This is called building your upcycler’s eye — the ability to see value where others see waste.
Start small: each time you’re about to toss something, ask:
“Could this be useful, beautiful, or functional in another form?”
If yes, set it aside for a future project. If not, recycle or dispose ethically.
✅ Quick Self-Check: Are You Ready to Upcycle?
If you say “yes” to any of these, you’re in the right place:
- You’re tired of waste and want to take creative action
- You love crafting but want it to feel more purposeful
- You’re curious about slow living and creative reuse
- You want to spend less, waste less, and enjoy more

Upcycled crafting offers all of that — and it starts with how you think.
Must-Have Tools and Eco-Friendly Materials For Upcycling
Whether you’re transforming old jeans into coasters or turning a wine bottle into a lamp, having the right tools and materials will make your upcycling journey smoother, safer, and far more enjoyable.
But upcycled crafting isn’t about buying loads of new supplies. It’s about choosing what’s essential, eco-conscious, and reusable. Let’s build your toolkit the right way.
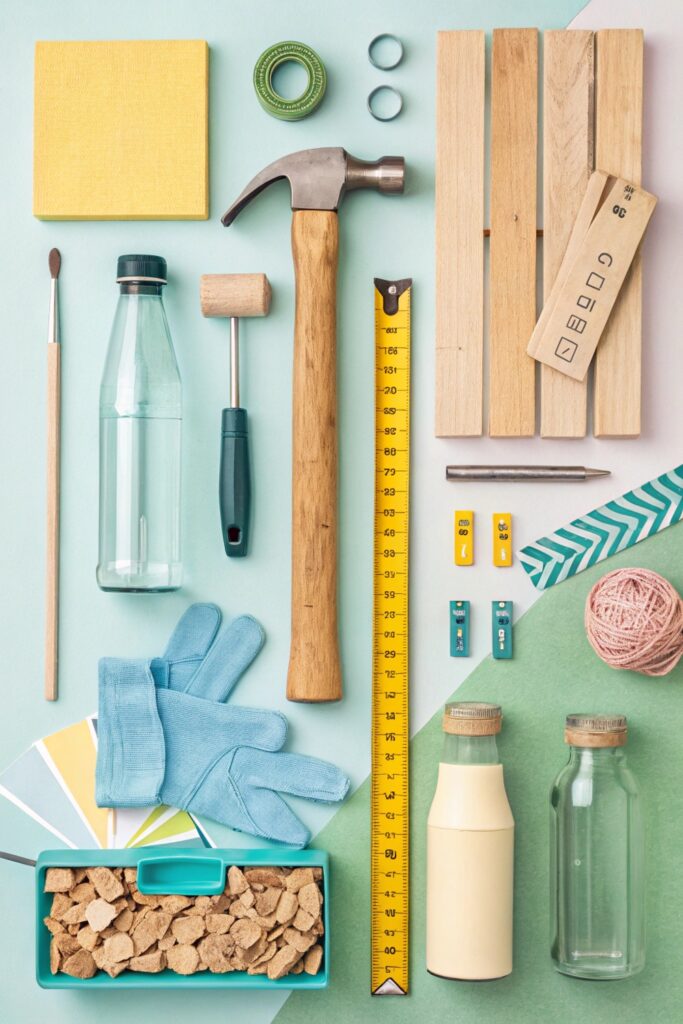
🧰 Basic Crafting Tools for Beginners
If you’re just starting out, here’s a core list of multi-purpose tools you’ll want to have on hand:
| Tool | Purpose | Sustainable Tip |
|---|---|---|
| Scissors | Fabric, paper, cardboard | Invest once in stainless steel, sharpen regularly |
| Craft knife | Precision cuts on cardboard, foam, plastic | Refillable, reusable handle = less waste |
| Hot glue gun | Strong adhesion on mixed materials | Use low-temp models and eco-safe glue sticks |
| Ruler & measuring tape | Accuracy in layouts and cuts | Choose metal or bamboo for durability |
| Pencil, chalk, or fabric marker | Marking measurements or designs | Avoid plastic markers, go reusable |
| Cutting mat | Protects surfaces | Reversible lasts longer, opt for PVC-free versions |
| Needle & thread | Basic sewing or repairs | Go for organic cotton or recycled thread |
| Safety pins, clips, clamps | Holding pieces in place | Reusable alternatives to tape or glue |
🛠️ Tools for Specific Upcycling Types
As you grow, you may want to experiment with different kinds of upcycling. Here are tools tailored to popular project types:
For Fabric Upcycling
- Seam ripper
- Sewing machine (manual or energy-efficient model)
- Rotary cutter
- Fabric weights (can DIY with stones or pouches)
For Furniture or Wood Projects
- Sandpaper blocks or sanding sponge
- Screwdrivers, pliers, hammer
- Hand drill or manual drill
- Non-toxic wood glue or clamps
For Packaging / Cardboard Crafts
- Bone folder (for clean folds)
- Mod Podge (eco version)
- Hole punch or eyelet setter
- Strong ruler or edge guide
For Plastic and Glass Upcycling
- Glass cutter or bottle cutter
- Protective gloves and eyewear
- Epoxy resin (plant-based versions available)
- Wire for decor or hanging projects

🔍 Upcycling Tip: Choose hand-powered tools when possible — they’re better for the environment and give you more control over your materials.
🌿 Eco-Friendly Alternatives to Traditional Craft Supplies
Avoid falling into the trap of buying “sustainable-looking” supplies that aren’t truly ethical. Instead, look for or DIY your own alternatives:

| Traditional Supply | Eco-Friendly Swap |
|---|---|
| Acrylic paint | Plant-based or milk paint, natural dyes |
| Plastic glue | Water-based, solvent-free adhesives |
| Polyester thread | Organic cotton or bamboo thread |
| Plastic glitter | Biodegradable glitter or crushed mica |
| Foam boards | Recycled cardboard or corkboard |
| Synthetic brushes | Bamboo-handled with natural bristles |
🧪 Safety note: Always look for non-toxic, child-safe, and VOC-free options, especially when crafting indoors or with kids.
♻️ Where to Source Secondhand or Sustainable Materials
Sustainable crafting starts with sourcing. Here are eco-conscious and budget-friendly ways to gather supplies:
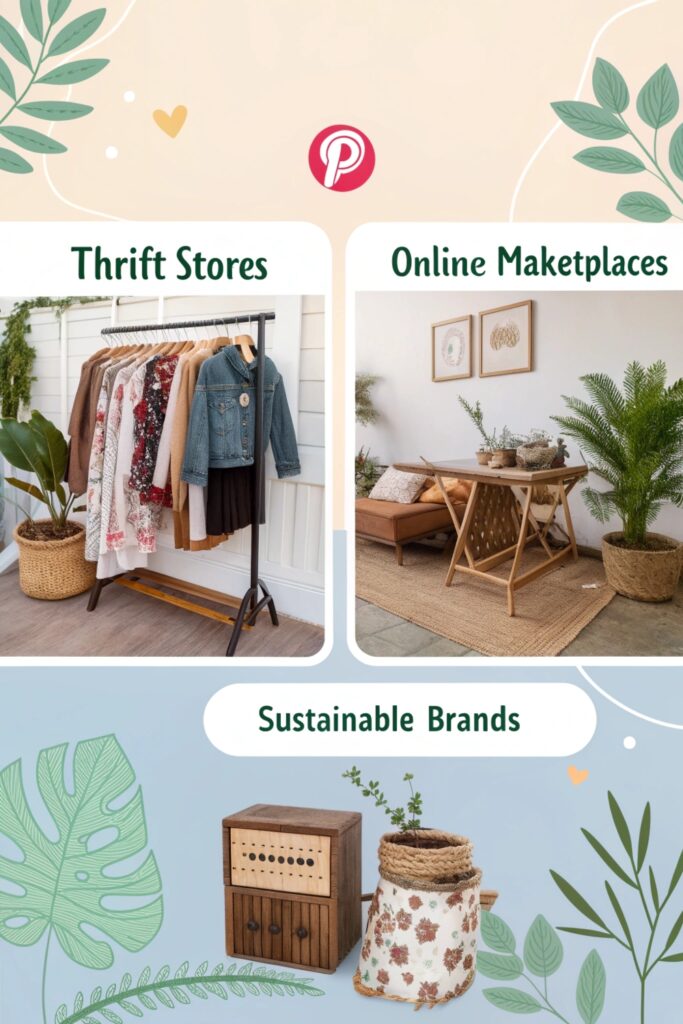
- Thrift stores (frames, fabric, glassware, belts, denim)
- Local buy-nothing or swap groups
- Freecycle / Craigslist “free” section
- Scrap stores or salvage centers
- Cafes and restaurants (for glass jars, bottle corks, trays)
- Tailors and fabric stores (ask for fabric offcuts or damaged rolls)
- Your own home – always the first place to “shop”
🌍 Bonus tip: Build relationships with local businesses — offer to pick up their discarded packaging, wooden pallets, or outdated decor.
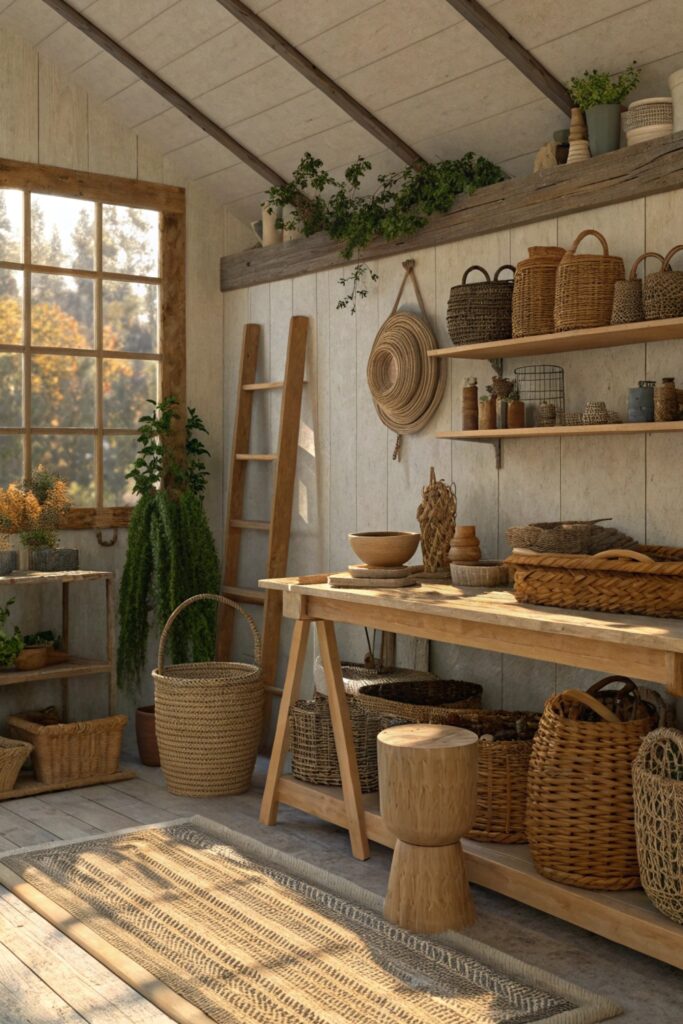
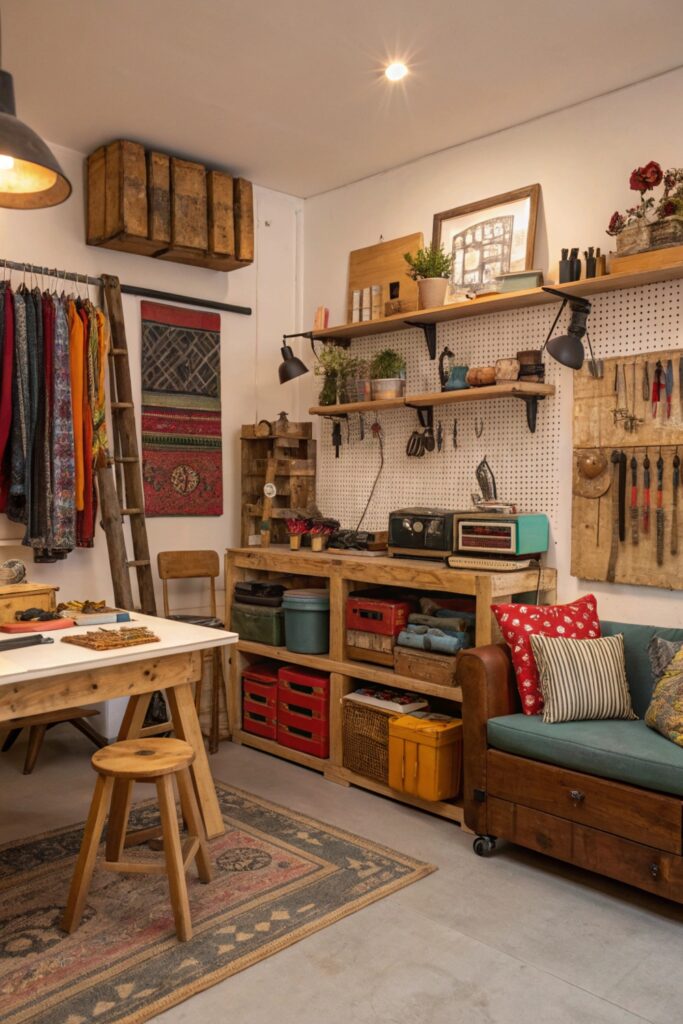
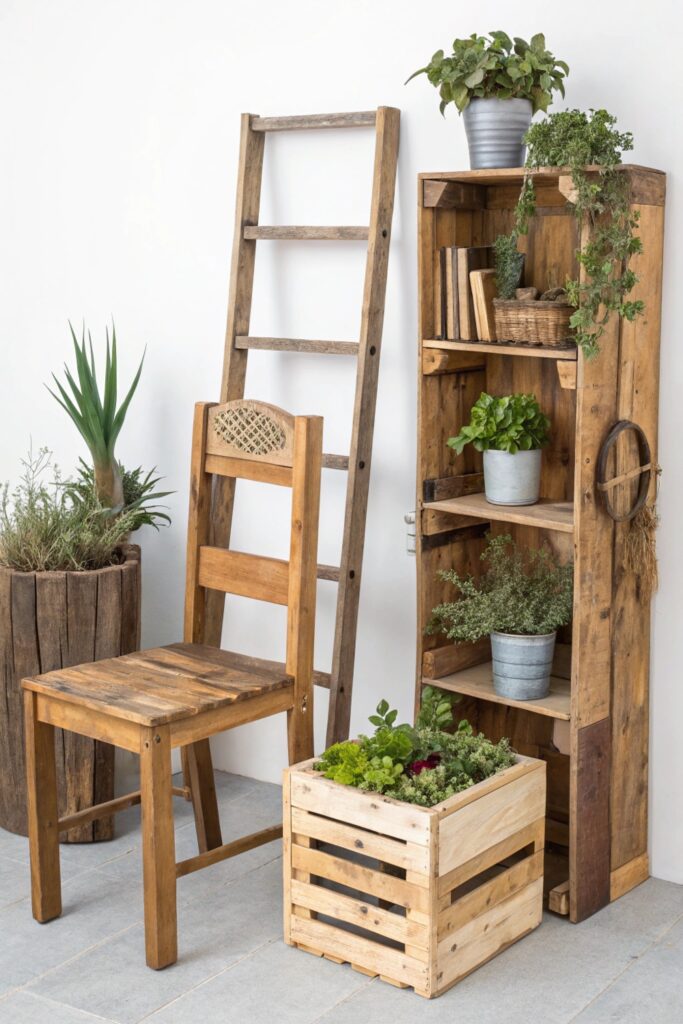
🧺 Building a Sustainable Crafting Space
You don’t need a whole studio to craft sustainably — just a dedicated, intentional corner that promotes reuse and order.
Ideas for an eco-friendly workspace:
- Upcycled furniture (table from an old door, storage from crates)
- Mason jars, tins, and glass containers for organizing materials
- Pegboards made from reclaimed wood
- Fabric bins made from old t-shirts or upholstery
- Task lighting with LED bulbs
- Reclaimed shelves or baskets from secondhand stores
💡 Keep a materials bin or “project drawer” where you store reusable scraps and interesting finds. It sparks creativity!
🧼 Material Safety, Cleaning & Prepping Tips
Upcycling often means working with used, dusty, or even mildly soiled items. Here’s how to clean and prepare them safely:
General Tips:
- Always clean with non-toxic, biodegradable soap
- Disinfect with white vinegar, lemon, or baking soda
- Let fabric air out to avoid mold/mildew
- Sand wood pieces lightly to remove finish or residue
- Always wear gloves and a mask if cleaning rust, mold, or paint flakes
For Specific Materials:
- Glass: Soak in warm water, peel off labels, use baking soda to scrub
- Fabric: Wash and line-dry. If upcycling denim or wool, pre-shrink it.
- Metal: Remove rust with vinegar soak or wire brush
- Plastic: Use warm soapy water and avoid high heat
⚠️ Safety Alert: Never work with materials you suspect are contaminated with lead, asbestos, or harsh chemicals unless you’re trained in safe handling.
✅ Wrap-Up Checklist: Build Your Upcycler’s Kit
- A few high-quality, multi-use tools
- A stash of clean, sorted materials
- A safe, organized crafting corner
- A sourcing strategy for secondhand finds
- A mindset of reuse, resourcefulness, and care
10 Beginner-Friendly Upcycling Projects (With Step-by-Step Ideas)
Turn Trash Into Treasure with These Easy, Sustainable DIYs
Starting your upcycling journey is easier — and more rewarding — than you might think. Whether you’re working with old t-shirts, glass jars, or cardboard boxes, these 10 beginner-friendly upcycled craft ideas are the perfect way to dip your toes into eco-conscious creativity.
Each project below uses readily available materials, involves basic tools, and highlights how you can create something beautiful and functional while keeping waste out of landfills.
Let’s get making! 🎨🌱
1. T-Shirt Yarn Plant Hanger
Upcycle old tees into stylish boho decor.
Materials Needed:
- 1–2 old cotton t-shirts (no side seams)
- Scissors
- Ruler or measuring tape
- Small planter or jar
- Optional: wooden ring or bead
Steps:
- Lay the shirt flat and cut horizontal strips (about 1-inch wide).
- Stretch each strip so it curls into yarn.
- Cut 8 equal-length strands (~3–4 feet).
- Tie strands together with a knot; divide into 4 groups of 2 and knot ~3″ up.
- Repeat until you create a netted pattern. Tie together at the top.
- Insert your planter and hang it!
Why it works: This project is perfect for zero-waste crafting and introduces the concept of textile reuse with a practical, Instagrammable result.
2. Mason Jar Herb Garden
Grow your own herbs in upcycled glass jars.
Materials Needed:
- Empty glass jars (pasta, salsa, etc.)
- Pebbles or gravel
- Potting soil
- Herb seeds (basil, mint, parsley, etc.)
- Paint, chalk labels, twine (optional)
Steps:
- Clean and remove labels from jars.
- Add pebbles for drainage.
- Fill 2/3 with soil.
- Plant seeds and lightly water.
- Decorate with labels or wrap twine around the top.
Why it works: Teaches glass reuse, indoor gardening, and gives readers a way to grow fresh food sustainably.
3. Denim Pocket Wall Organizer
Turn old jeans into storage art.
Materials Needed:
- Old denim jeans
- Fabric scissors
- Needle/thread or hot glue
- Wooden hanger or dowel
- Optional: felt, fabric scraps for backing
Steps:
- Cut out back pockets, leaving some margin.
- Arrange and glue/stitch onto a backing fabric.
- Attach the fabric to a wooden hanger.
- Hang and use to store small tools, notes, etc.
Why it works: Combines textile recycling and practical crafting — a favorite on Pinterest.
4. Cardboard Drawer Dividers
Organize your space with custom-fit upcycled storage.
Materials Needed:
- Cardboard (shipping boxes, cereal boxes)
- Ruler
- Craft knife
- Decorative paper or fabric (optional)
Steps:
- Measure your drawer and cut cardboard pieces accordingly.
- Notch the center of each piece halfway down so they interlock.
- Cover with paper or fabric if desired.
- Assemble in your drawer.
Why it works: Appeals to organizing DIYers and zero-waste living fans.
5. Upcycled Tin Can Lanterns
Create atmospheric lighting for indoors or out.
Materials Needed:
- Empty tin cans
- Nail and hammer or drill
- Tea light candles or LED lights
- Paint or twine (optional)
Steps:
- Fill can with water and freeze (helps maintain shape).
- Use nail/hammer to punch holes in patterns.
- Let melt, clean, and dry.
- Decorate or leave natural.
- Place a candle inside and enjoy!
Why it works: Combines metal reuse and beginner DIY home decor — great for eco-friendly ambiance.
6. No-Sew T-Shirt Tote Bag
Fast, functional, and fashionably green.
Materials Needed:
- Old t-shirt
- Scissors
- Ruler
Steps:
- Cut off sleeves and neckline.
- Decide bag length and cut fringe at the bottom.
- Tie fringe together tightly.
- Turn inside out for a clean finish.
Why it works: Encourages slow fashion values while delivering a functional daily-use item.
7. Wine Bottle Self-Watering Planter
Hydrate plants effortlessly with this sleek upcycled solution.
Materials Needed:
- Empty wine bottle
- Glass cutter
- Sandpaper
- String or cotton rope
- Potting soil and plants
Steps:
- Cut bottle in half and sand edges.
- Thread rope through neck and add soil to top half.
- Fill bottom half with water and nest the top.
- Rope wicks moisture into the soil.
Why it works: Beautiful and functional — perfect for eco-conscious plant parents.
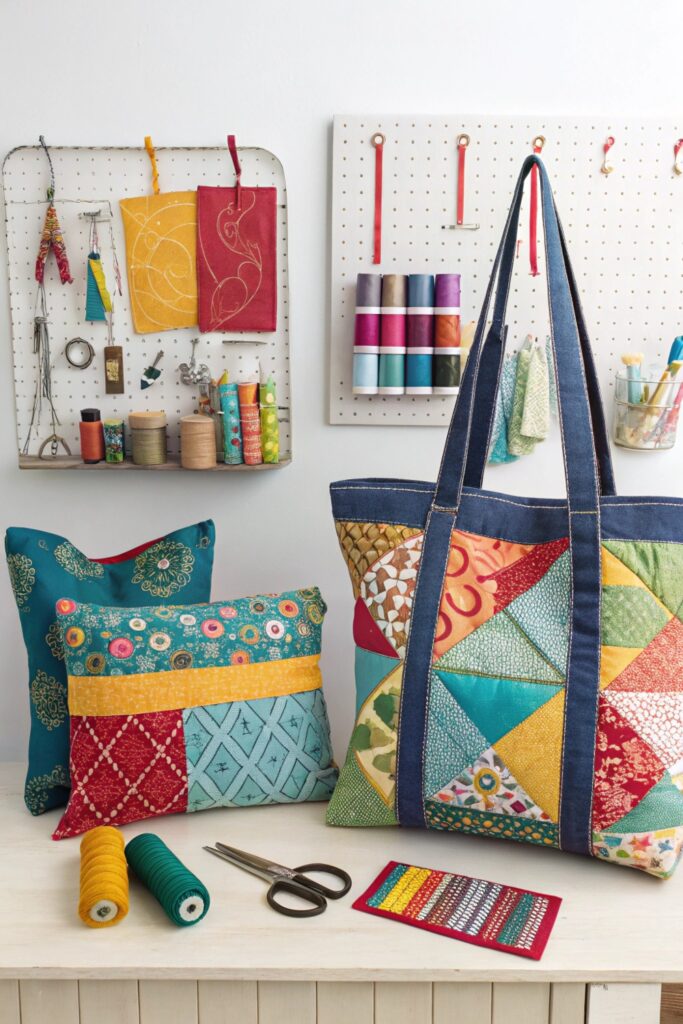
8. Scrap Fabric Coasters
Keep it cozy with colorful, handmade drink coasters.
Materials Needed:
- Fabric scraps
- Scissors
- Needle/thread or glue
- Circular object for template
- Felt for backing (optional)
Steps:
- Trace and cut fabric circles.
- Stitch or glue layers together.
- Add felt backing for strength.
Why it works: Introduces zero-waste fabric crafting — and they’re highly giftable.
9. Recycled Paper Seed Bombs
Grow wildflowers from junk mail.
Materials Needed:
- Used paper (newspapers, mail, old notebooks)
- Blender
- Water
- Wildflower seeds
- Strainer and towel
Steps:
- Soak paper in water overnight.
- Blend into pulp.
- Mix in seeds.
- Form into balls, strain, and dry.
Why it works: Fun, educational, and seasonally sharable — great for Earth Day or wedding favors.
10. Pallet Wood Wall Art
Rustic vibes with serious sustainability points.
Materials Needed:
- Pallet wood
- Sandpaper
- Nails or wood glue
- Paint or wood stain
- Hanging hardware
Steps:
- Sand pallet slats smooth.
- Arrange in pattern (chevron, horizontal, patchwork).
- Attach slats together.
- Decorate with paint or stencils.
Where and How to Source Upcycled Materials (Legally and Sustainably)
Turn your neighborhood and home into a goldmine of creative supplies — responsibly.
One of the most exciting parts of upcycling is the treasure hunt — finding overlooked or discarded items and giving them a second life. But not all sourcing is equal. To truly upcycle sustainably, ethically, and legally, you need to know where to look, what to avoid, and how to build a flow of materials that supports your creative goals.
This section will guide readers to become savvy, eco-conscious material gatherers while staying compliant and smart with their sourcing.
♻️ 1. Shop Your Home First
Before you head to a thrift store or the curb, take inventory of what you already have. Most people are surprised by how much usable material is just sitting in:
- Junk drawers (old cords, keys, containers)
- Closets (torn clothes, mismatched socks, worn-out bags)
- Kitchen cabinets (jars, tins, trays, glassware)
- Garage or shed (scrap wood, paint cans, tools)
✨ Pro Tip: Create a “materials bin” or shelf to collect potential supplies. Over time, you’ll have your own curated stash ready for any project.
🛍️ 2. Local Thrift Stores & Secondhand Shops
Places like Goodwill, Habitat for Humanity ReStore, or independent thrift stores are excellent for finding:
- Textiles: vintage fabric, old clothes, lace, tablecloths
- Furniture: side tables, mirrors, picture frames, drawers
- Kitchenware: glass bottles, utensils, baking tins
- Miscellaneous: books, photo albums, crafting tools
Look for “Damaged” or “As-Is” bins — these often hide the best upcycling candidates at a discount.
🌐 3. Free & Community-Based Sources
Some of the best finds are completely free — if you know where to look.
Online Platforms:
- Freecycle.org
- Buy Nothing Project (via Facebook groups)
- Craigslist “Free” section
- Nextdoor (search terms: “moving,” “clean out,” “curb alert”)
Offline Ideas:
- Curbside pickups / bulk trash day
- College move-out days
- Community yard sales (show up at the end for freebies)
- Flea markets (haggle for parts or broken items)
✅ Be mindful: Always ask permission before taking items from curbs or communal areas.
🏗️ 4. Salvage Yards & Architectural Reuse Centers
For those working on furniture, decor, or mixed-material projects, architectural salvage centers are goldmines. You’ll find:
- Reclaimed wood
- Metal fixtures
- Doors, windows, drawer pulls
- Tile remnants, wood panels
These are especially great if you want your upcycling projects to have a vintage, rustic, or industrial feel.
🧵 5. Fabric & Craft Store Offcuts
Even traditional craft supply stores have waste — and they’re often happy to give it away or sell it cheap:
- Ask for remnant fabric bins
- Check for broken zippers, snapped spools, or mismatched yarn
- Tailors or upholstery shops may have scrap bins for donation
🧠 Insider trick: Build a relationship with local seamstresses or tailors. Offer to take scrap materials off their hands regularly.
🏫 6. Schools, Offices, and Small Businesses
Offices and institutions dispose of a ton of potential upcycling materials:
- Packaging waste (boxes, paper rolls, bubble wrap)
- Obsolete office supplies (binders, folders, paper clips)
- Old signage, banners, or marketing materials
Schools especially may have:
- Art supply leftovers
- Broken toys or tools
- Outdated classroom items
🤝 Tip: Email or visit in person. Let them know you’re a sustainable crafter and ask to be notified before they discard items.
⚠️ 7. What NOT to Take (Legality & Safety)
Not everything that looks usable is safe or legal to take. Avoid:
- Items on private property without permission
- Hazardous materials (paint with lead, rusted metals, moldy fabrics)
- Mattresses, upholstered furniture (risk of bedbugs)
- Electronics with batteries or internal wiring unless you’re trained
- Anything with biohazard potential (used personal items, pet items)
🧽 Always clean, disinfect, and inspect materials before using them — especially for indoor or children’s crafts.
🌍 8. Build a Sustainable Sourcing Routine
To avoid overwhelm or hoarding, set up systems to keep your craft flow sustainable:
- Set sourcing days — don’t impulse collect every day
- Use clear bins or jars to sort materials by type
- Donate or regift materials you no longer need
- Swap with other upcyclers or crafters via online communities
✉️ Want to go pro? Set up a newsletter or Instagram stories where you share your finds — others might want to trade or collaborate!
How to Clean and Prepare Materials for Upcycling Projects
Start every project safely, beautifully, and with long-lasting results.
Upcycling isn’t just about crafting — it’s about doing it ethically, safely, and with care. Prepping your materials is a non-negotiable step in any sustainable DIY journey. Whether you’re using glass jars, scrap wood, old fabrics, or plastic containers, the right prep can turn “trash” into lasting treasure.
This section teaches beginners how to clean, sanitize, and prep different types of materials the right way — enhancing safety, durability, and overall finish.
🧼 1. Why Prepping Materials Matters
- Health & Safety: Upcycled materials can harbor bacteria, mold, rust, or pests. Cleaning reduces risks.
- Craft Longevity: Prepped surfaces (especially wood and fabric) hold glue, paint, and finishes better.
- Professional Results: Sanding, washing, or priming improves the look and usability of any item.
- Sustainability: Prepping ensures you’re reusing with respect and care — not simply adding clutter.
🧺 2. General Cleaning Tips for All Materials
Before getting specific, here are some universal best practices:
- Inspect items thoroughly under good lighting
- Use non-toxic cleaners (like vinegar, baking soda, or eco soap)
- Soak and scrub where possible
- Rinse and air dry completely before use
- Always wear gloves and masks when handling dusty, rusty, or unknown items
🧴 3. Cleaning by Material Type
♻️ Glass & Ceramics (Jars, Bottles, Plates)
- Remove labels by soaking in warm, soapy water
- Use a baking soda + oil paste for stubborn glue
- Sanitize in boiling water (optional)
- Check for cracks before using for candles, planters, etc.
🧵 Textiles (Old Clothes, Curtains, Linens)
- Wash on hot if possible — twice for secondhand fabrics
- Add white vinegar to remove smells and soften
- Iron before cutting for precise measurements
- Avoid using heavily stained or moldy fabrics
🪵 Wood (Pallets, Drawers, Scrap Pieces)
- Check for wood rot, termites, or mold
- Sand thoroughly with medium-to-fine grit
- Clean with a vinegar-water spray
- Let dry for 24–48 hours
- For pallets: ensure they’re HT stamped (heat-treated) — avoid “MB” (chemically treated)
🪙 Metal (Cans, Tools, Fixtures)
- Wash with dish soap and warm water
- Use vinegar or lemon juice to remove rust
- Dry thoroughly to prevent new rust
- File sharp edges or use pliers to crimp
🧃 Plastic (Containers, Bottles, Packaging)
- Avoid plastics marked with recycle codes #3, #6, or #7 unless you know their origin
- Wash with dish soap and rinse well
- Disinfect with hydrogen peroxide or vinegar
- Test flexibility and brittleness before cutting or heating
🧹 4. Dealing With Rust, Odors & Grime
- Rust: Soak metal in white vinegar or lemon juice + salt, then scrub with steel wool
- Odors: Sun-dry, sprinkle with baking soda, or seal in a bag with coffee grounds overnight
- Sticky residue: Use a mix of oil and baking soda, let sit for 15 mins, scrub clean
🚫 5. Materials You Should Not Try to Salvage
Even the most creative crafters know when to walk away. Avoid:
- Items with mold, asbestos, or water damage
- Pesticide-treated wood (often green-tinted)
- Electronics with internal batteries or circuit damage
- Dirty or cracked plastics of unknown origin
- Items from questionable sources (illegal dumping, biohazard risk)
✅ 6. Storage After Prepping
Keep your prepped materials clean and ready:
- Store fabric in sealed bins or vacuum bags
- Keep wood and metal in a dry place
- Sort small pieces (buttons, fasteners, cords) in clear labeled jars
- Create a mini inventory in a notebook or app to track what’s on hand
🛠 Pro Crafter’s Tip: The cleaner and better-prepped your materials, the more likely you are to actually finish your project — and love the results!
Basic Upcycling Techniques for Beginners
Craft confidently with essential hands-on skills every upcycler should master.
So, your materials are cleaned and prepped — now what? It’s time to roll up your sleeves and learn the foundational techniques that turn everyday items into beautiful, functional, and meaningful creations. Whether you’re upcycling fabric scraps, old furniture, glass jars, or tin cans, these beginner-friendly skills will help you create with confidence and creativity.
This section focuses on safe, practical, and versatile techniques that are easy to learn but powerful in their application.
✂️ 1. Cutting & Disassembling Materials Safely
Different materials need different approaches — and the right tools make all the difference.
🔨 Wood & Furniture:
- Use a hand saw or jigsaw for larger pieces
- For breaking down furniture, keep tools like screwdrivers, crowbars, pliers
- Always remove nails, staples, or old screws before repurposing
✂️ Fabric:
- Sharp fabric scissors or rotary cutters
- Remove seams using a seam ripper
- Deconstruct old clothes or linens into panels, strips, or squares
🪛 Metal & Plastic:
- Use tin snips for thin sheet metal
- For plastic containers, start with utility knives or heavy-duty scissors
- Always sand sharp edges smooth
⚠️ Safety First: Wear gloves, goggles, and a dust mask when cutting or sanding.
🖌️ 2. Sanding, Smoothing & Surface Prep
To help your paints, glues, and finishes stick:
- Start with a medium-grit (120) sandpaper, then smooth with fine-grit (220–320)
- For wood, sand with the grain to prevent splintering
- Lightly sand plastic and metal before painting to improve adhesion
- Use sanding blocks for flat surfaces and sponges for curves
🌱 Choose non-toxic sanding sponges or reusable sanding blocks for eco-friendlier crafting.
🧷 3. Gluing, Sealing & Fastening
📎 Types of Adhesives:
- Hot glue: fast and flexible, great for decor items
- Wood glue: strong bond for furniture and wooden pieces
- Fabric glue: for textiles when sewing isn’t ideal
- E6000 or epoxy: industrial strength for mixed materials (metal, glass, plastic)
⚠️ Avoid toxic glues unless necessary — use water-based or solvent-free options where possible.
🪢 Fastening Techniques:
- Use nails, screws, brads, or clamps for strong mechanical bonds
- For soft materials, try rivets, eyelets, or velcro
🖍️ 4. Painting, Staining & Finishing
Transform the look and feel of upcycled items:
🎨 Painting:
- Use chalk paint for a matte, vintage look (no priming needed)
- Acrylic paint for craft items
- Spray paint for even coats on glass, plastic, and metal (choose low-VOC or water-based options)
- Always apply a primer for a long-lasting finish
🪵 Staining & Waxing:
- Great for highlighting the grain in wooden pieces
- Use natural stains (like coffee or tea) for eco alternatives
- Finish with beeswax or hemp oil instead of chemical sealants
✅ Finish every paint job with a protective coat (eco varnish or water-based polyurethane).
✂️ 5. Simple Sewing & No-Sew Techniques
For upcycling textiles and garments:
- Learn basic stitches: running stitch, backstitch, whip stitch
- Try fusible webbing for bonding fabrics without sewing
- Use fabric tape, snaps, or buttons for easy closures
- Turn old clothes into tote bags, cushion covers, or wall art with minimal cuts
🧵 Don’t have a sewing machine? No problem! Hand sewing and no-sew hacks work great for small upcycling projects.
🖋️ 6. Stenciling, Decoupage & Decorative Finishes
Add personality and polish to your pieces:
✨ Stenciling:
- Use stencils with chalk paint or acrylics
- Perfect for jars, wooden signs, or fabric art
📄 Decoupage:
- Apply old book pages, napkins, or maps with Mod Podge or homemade glue
- Seal with a top coat for durability
🧼 Distressing:
- Lightly sand corners and edges after painting for a rustic, vintage effect
♻️ 7. Eco-Friendly Finishing Products to Know
Many traditional finishes are chemical-heavy. Choose these greener alternatives:
| Purpose | Eco Alternative |
|---|---|
| Sealant | Beeswax, carnauba wax, hemp oil |
| Adhesive | Natural glue, wheat paste |
| Paint | Milk paint, low-VOC acrylics |
| Stain | Coffee, tea, vinegar + steel wool |
🌍 Upcycling isn’t just about reusing materials — it’s about reducing your environmental impact at every step.
🎯 Next Step: Practice Makes Perfect
Start small:
- Paint and label old jars
- Turn t-shirts into braided rugs
- Upcycle a drawer into a shelf
- Restore an old stool with sanding and paint
With these core skills under your belt, you’ll be ready for more advanced and creative projects.
Creative Upcycling Project Ideas
Inspiration for every skill level, season, and space — sustainable style starts here.
Now that you’ve got the foundational skills, tools, and prep techniques, it’s time to unleash your creativity. This section offers a thoughtfully categorized list of inspiring, beginner-friendly upcycling projects — tailored for different rooms in the home, skill levels, and seasonal occasions.
Whether you’re working with fabric scraps, old jars, wooden crates, or tin cans, you’ll find ideas that are both practical and Pinterest-worthy.
🏡 1. For Every Room in the Home
🛋️ Living Room:
- Drawer-to-Shelf Makeover: Mount an old drawer to the wall for a rustic shelf
- Pallet Coffee Table: Sand and paint a pallet, add wheels or legs
- Upcycled Art Frames: Use old books, window panes, or ornate frames as wall decor
🍽️ Kitchen:
- Tin Can Utensil Holders: Wrap with jute or paint, label for cutlery or herbs
- Mason Jar Spice Racks: Mount jars under a shelf using screw lids
- Old Cutting Board Message Center: Add chalkboard paint for daily menus
🛏️ Bedroom:
- T-shirt Memory Quilt: Sew old t-shirts into a cozy patchwork blanket
- Vintage Ladder as a Blanket Rack
- Drawer Pull Jewelry Organizer: Hang earrings and necklaces with ease
🚽 Bathroom:
- Mason Jar Organizers: Mounted to reclaimed wood for toothbrushes and makeup brushes
- Towel Hooks from Old Utensils: Bend forks/spoons into hooks
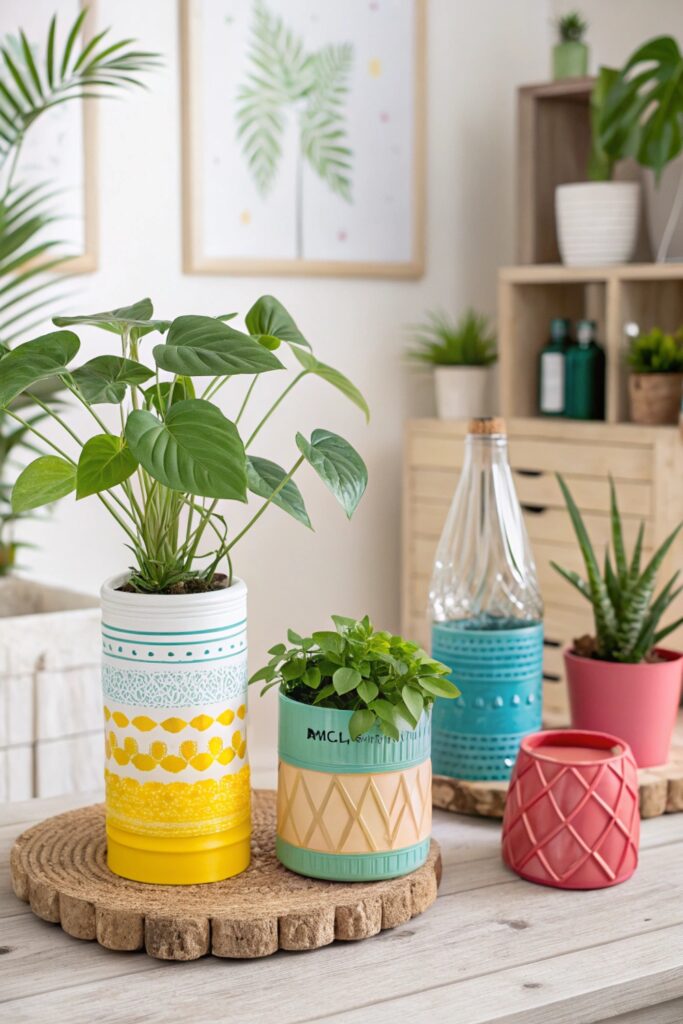
- Shampoo Bottle Planters: Cut and paint plastic bottles for succulents
🎒 Kids’ Room:
- Toy Box from a Crate: Add casters and chalkboard labels
- Stuffed Animal Swing: Repurpose rope and scrap wood
- Chalkboard Closet Doors: Paint for interactive creativity
🎯 2. Skill-Level Based Projects
🟢 Beginner:
- Glass jar lanterns with tea lights
- T-shirt yarn coasters
- Tin can planters
- CD mosaic wall art
🟡 Intermediate:
- Pallet wall shelves
- Fabric scrap bunting
- Sweater pillow covers
- Drawer-turned-side table
🔴 Advanced:
- Window frame coffee table
- Denim rug from old jeans
- Upholstered bench from reclaimed bed frame
- Full dining set makeover with sanding and eco-staining
🌿 3. Seasonal & Holiday-Themed Upcycling
🎄 Christmas:
- Sweater Ornaments: Cut and sew mini sweater shapes
- Bottle Cap Snowmen
- Book Page Trees: Folded paper into tabletop decor
🎃 Halloween:
- Tin Can Luminaries: Punch holes in patterns and paint
- Milk Jug Ghosts: Light from within
- T-shirt Trick-or-Treat Bags
🌸 Spring:
- Painted Tin Can Herb Garden
- Upcycled Rain Boot Planters
- Floral Jar Centerpieces
☀️ Summer:
- Old Ladder Potting Station
- Flip-Flop Wreath
- T-shirt Beach Bags
🍁 Autumn:
- Sweater Pumpkins
- Pallet Welcome Signs
- Jar Lid Leaf Garlands
🧠 Try combining seasons with upcycled items to get multiple uses from the same piece!
♻️ 4. Combine Craft & Functionality
Great upcycled projects don’t just look good — they’re useful, too.
- Charging station from old book or box
- Shoe rack from pallets
- Calendar board from old window frame
- Tool holder from garden rake head
📸 5. Ready for Pinterest & Social Sharing
Want to create something that gets shared, saved, and pinned? These ideas are trending:
- “Trash to Treasure” before-and-after reels
- Step-by-step tutorials of a reclaimed furniture flip
- “One-Item Challenge” (e.g., 5 ways to use a tin can)
- “Zero-Waste DIY Decor” roundups
🎥 Add your personal touch by documenting the journey — not just the result. Stories inspire action.
How to Sell or Gift Your Upcycled Creations (Ethically & Effectively)
Turn your passion into purpose — or even profit — while staying true to sustainable values.
Upcycling isn’t just a craft; it’s a movement. Once you’ve created a few beautiful, functional, and eco-conscious pieces, you’ll likely want to share them with the world — whether by gifting them to friends or offering them for sale. This section covers how to do both ethically, attractively, and responsibly, aligned with your values and today’s sustainability-conscious audience.
🎁 1. Gifting Upcycled Items with Meaning
Upcycled gifts are thoughtful, creative, and often more appreciated than store-bought ones — as long as they’re made and presented with care.
🧡 Tips for Meaningful Gifting:
- Personalize: Use initials, photos, favorite colors
- Include a story tag: Explain the material’s origin (e.g., “This was made from your grandpa’s shirt.”)
- Package beautifully using eco-friendly wraps: fabric wrap (furoshiki), kraft paper, twine
- Avoid gifting things that feel “too handmade” unless they’re functional or aesthetic
🎁 Gift-Worthy Ideas:
- Upcycled denim apron
- Candle holders made from vintage teacups
- Framed art from old sheet music or book pages
- Fabric baskets from t-shirts
- Handmade planter stands from scrap wood
📝 Add a care note: How to wash, store, or reuse the item (bonus sustainability points!)
💰 2. Selling Your Upcycled Crafts Online
Selling upcycled crafts is a wonderful way to monetize your creativity — especially as demand for sustainable, handmade goods is booming.
🛍️ Best Platforms for Eco-Conscious Crafters:
- Etsy: Ideal for niche, handmade, and vintage items
- Facebook Marketplace: Great for local pickup on furniture or decor
- Instagram + DM Sales: Visual platform for building a personal brand
- Your Own Website or Shopify: For building long-term authority and direct traffic
- Local Markets & Fairs: Ideal for testing products and gaining exposure
🔍 SEO & Listing Tips:
- Use high-search keywords like “upcycled wall art,” “eco-friendly gifts,” “zero-waste home decor”
- Include materials in your title and tags (e.g., “Upcycled pallet wood shelf”)
- Be transparent about how it was made — buyers LOVE stories
- Price fairly: cover time, materials, tools, AND value-added sustainability
📸 Use clear, bright photography and “before and after” photos to increase trust and emotional connection.
♻️ 3. Ethical Selling Practices
To truly align with sustainable crafting:
- Use responsibly sourced or post-consumer materials only
- Disclose material sources when possible (e.g., “Salvaged from local construction site”)
- Avoid overproduction — make to order or in small batches
- Reuse packaging materials or opt for compostable shipping supplies
🌍 Sustainability sells — but only when it’s authentic and traceable.
💡 4. Pricing Upcycled Items: How Much Is It Worth?
Crafting doesn’t mean underpricing. Price smart:
| Factor | Tip |
|---|---|
| Materials | Include full cost, even if salvaged (time = value) |
| Time | Track hours spent prepping, making, finishing |
| Uniqueness | One-of-a-kind? Charge accordingly |
| Eco Value | Emphasize sustainability — many buyers will pay more |
| Market Research | Compare similar upcycled listings on Etsy, Pinterest |
🧾 Use a cost calculator spreadsheet to maintain consistency and avoid undervaluing your work.
📈 5. How to Build a Brand Around Upcycled Goods
Want to grow beyond hobbyist? These are your first steps:
- Create a brand name and logo that reflects eco-values (e.g., “Reclaim & Revive,” “The Earth Edit”)
- Stay consistent with your aesthetic (natural textures, minimal packaging, green tones)
- Share “why you upcycle” on your bio/about page
- Leverage platforms like Pinterest, YouTube, or TikTok to show process videos and tutorials
- Offer DIY kits or digital patterns to diversify income
🧠 Upcycled crafts are emotional products. Your values are part of the brand.
✨ Final Thought for Gifting or Selling
Whether it’s a single painted jar or a small upcycled business, each piece you create carries a message:
“We can make beautiful things — without making more waste.”
That story is what people are really buying into. Be proud to share it.
Common Upcycling Mistakes & How to Avoid Them
Learn from others’ missteps so your upcycling journey is smooth, safe, and stunning.
Even the most passionate DIYers can hit a few snags along the way. From structural failures to aesthetic flops, many upcycling mistakes are completely avoidable — if you know what to watch for. In this section, we’ll go over common errors beginners make, and how to prevent them using smart, sustainable, and safe practices.
⚠️ 1. Skipping Proper Prep
Mistake: Jumping straight into painting or gluing without cleaning or sanding the item.
- Why It Matters: Dirt, oils, or old finishes prevent paints, stains, or adhesives from bonding properly.
- Avoid It By: Always clean with mild soap and water, dry thoroughly, and sand or prime surfaces as needed.
- Upcycling Pro Tip: A quick vinegar rinse can cut grease and prep items naturally.
💡 2. Using the Wrong Tools or Materials
Mistake: Forcing scissors through thick plastic or using wood glue on metal.
- Why It Matters: Wrong tools = poor results, wasted time, or even injuries.
- Avoid It By: Match the tool to the task. Keep a basic toolset specific to material types (wood, fabric, glass, metal).
- Resource Reminder: Refer back to Section V for a breakdown of essential tools by category.
🛑 3. Overdecorating or Overengineering
Mistake: Adding too many design elements or making something too complex.
- Why It Matters: Overdoing it can make a piece look cluttered or lose function.
- Avoid It By: Stick to a clear purpose or theme. Let the material’s texture, patina, or history be part of the design.
- Sustainable Tip: Less = more. Avoid unnecessary trims, glitters, or plastic embellishments.
💥 4. Ignoring Structural Safety
Mistake: Upcycled furniture collapses or shelves fall off the wall.
- Why It Matters: Structural integrity is essential, especially for functional pieces.
- Avoid It By: Check for cracks, rot, or rust before upcycling. Reinforce weak joints with brackets, glue, or screws.
- Pro Move: Never upcycle furniture for kids or pets without making it fully stable and smooth-edged.
🌍 5. Not Staying Eco-Friendly
Mistake: Using harsh chemicals or single-use packaging in the process.
- Why It Matters: It defeats the purpose of eco-conscious crafting.
- Avoid It By: Choose low-VOC paints, natural stains, reusable tools, and compostable packaging.
- Ethical Insight: If you’re gifting or selling, transparency = trust. Mention the sustainable materials you used.
📸 6. Not Documenting Your Work
Mistake: Forgetting to take before/after shots or process photos.
- Why It Matters: It’s hard to share or grow a brand without a visual trail.
- Avoid It By: Always snap a “before” photo. Shoot progress and final shots in good lighting.
- Marketing Angle: These make amazing Pinterest pins, Etsy listings, and Instagram stories — and they build trust.
⌛ 7. Underestimating Time or Skill
Mistake: Choosing a project that’s too advanced or time-consuming too soon.
- Why It Matters: Can lead to frustration, wasted materials, or half-finished projects.
- Avoid It By: Start with simple wins. Gradually build your skills with practice and tutorials.
- Friendly Reminder: Progress over perfection — upcycling is a learning journey.
✅ Bonus Tip: Don’t Copy, Reimagine
Instead of replicating someone else’s Pinterest project exactly, use it as inspiration.
- Consider: What can I add or change to make it mine?
- Mix different materials, colors, or uses to give your version a unique voice.
Upcycling celebrates originality — so don’t be afraid to experiment.
Final Thoughts: Upcycling as a Lifestyle & Mindset
It’s more than a craft. It’s a conscious choice — a creative revolution for the planet and your soul.
By now, you’ve seen that upcycling is not just a trendy DIY activity — it’s a mindset, a movement, and a more intentional way of living.
In a world overwhelmed by fast fashion, single-use plastics, and disposable everything, upcycling gives us the power to pause, rethink, and re-create. It shifts our focus from consuming to contributing — from throwing away to giving new life.
🌱 Upcycling is Sustainability in Action
- It reduces landfill waste and carbon emissions
- It challenges us to use what we already have
- It encourages circular thinking and slow living
Every time you upcycle something — no matter how small — you’re making a micro-impact with macro-meaning.
🎨 Upcycling Sparks Everyday Creativity
- You don’t need to be a professional artist
- You don’t need fancy tools or a huge budget
- You just need vision, curiosity, and a willingness to try
Through upcycling, you’ll start to see the world differently: a scratched chair becomes a plant stand; a broken teacup becomes a candle; a box of buttons becomes wearable art.
“To live creatively is to look at the ordinary and see the extraordinary.”
— Unknown
🧘 It’s Also Self-Care
Many upcyclers describe the process as meditative, grounding, and healing.
There’s something uniquely satisfying about working with your hands, reclaiming forgotten things, and giving them a second story.
It’s eco-therapy — creativity meets mindfulness.
💬 Your Voice, Your Values, Your Legacy
Whether you choose to gift your upcycled items, sell them, or simply use them in your home — you’re telling the world:
“I care about this planet. I care about creativity. I believe beauty doesn’t require waste.”
This guide isn’t just about making crafts. It’s about making a difference.
📣 What’s Next?
Here’s how to keep growing:
- Explore our upcoming tutorials for seasonal upcycling projects
- Join our community (newsletter or Facebook group) to share, ask, and inspire
- Start your own upcycling challenge — 30 days of reuse
- Teach a friend or child what you’ve learned here
- Pin, post, and pass it on — because good ideas deserve to be shared
💚 Final Words
Upcycling is a journey of transformation — for materials, for your home, and for yourself.
As you start seeing possibility in every object, you’ll realize: the best ideas don’t require more stuff — they require more imagination.
So go ahead… open that junk drawer, peek in the attic, and ask yourself:
“What can I reimagine today?”
Because the future is handmade — and you’re helping build it.